Recording hardware instruments with a computerUpdated 5 months ago
Due to their general versatility, ease of use and low cost, there is no doubt that a DAW - which stands for Digital Audio Workstation - offers one of the most popular solutions for making music nowadays.
We also live in an age where there is a really vast wealth of options for music production software, audio and MIDI interfaces and various other related pieces of kit but this can also make the task of getting everything you need together quite daunting when you are looking to get started.
Let's say you have just bought a great new synth and you want to record it using your computer. If you are interested in what you need to get started and how do get everything correctly connected and setup, read on.
For the example in this tutorial, there are only a few things you will need:
- A suitable computer and music production software. Most relatively recent computers running Windows or macOS should be fine for this task provided they can handle your choice of DAW software.
- An audio interface. There are many options for this depending on your budget and what else you may want to record. If you are thinking about recording guitars, bass or vocals using a microphone, you should make sure that the interface you choose provides both "Hi-Z" (ie instrument) and "Line" inputs although you don't necessarily need to have everything connected to interface at the same time if you record one instrument at a time.
- Your new synthesizer and the right type of cables to connect it to your audio interface. We would suggest avoiding using any sort of adaptors or cables other than the correct type for the particular device you are going to record.
- Last but not least, you will need to connect either headphones or monitor speakers to the audio interface's outputs so that you can hear everything.
Now that you have everything you need to hand, we should be able to get started with the physical connections and software settings. There are different ways of doing this but we will go through one of the most commonly used methods for this tutorial which is a setup that allows you to record both MIDI and audio.
While we will guide you through the connections and settings for a minilogue xd with an Audient ID44 interface and REAPER, the same basic principle applies to most other current hardware instruments, interfaces and DAW software so you can use the same procedure for most other comparable hardware instruments and DAWs.
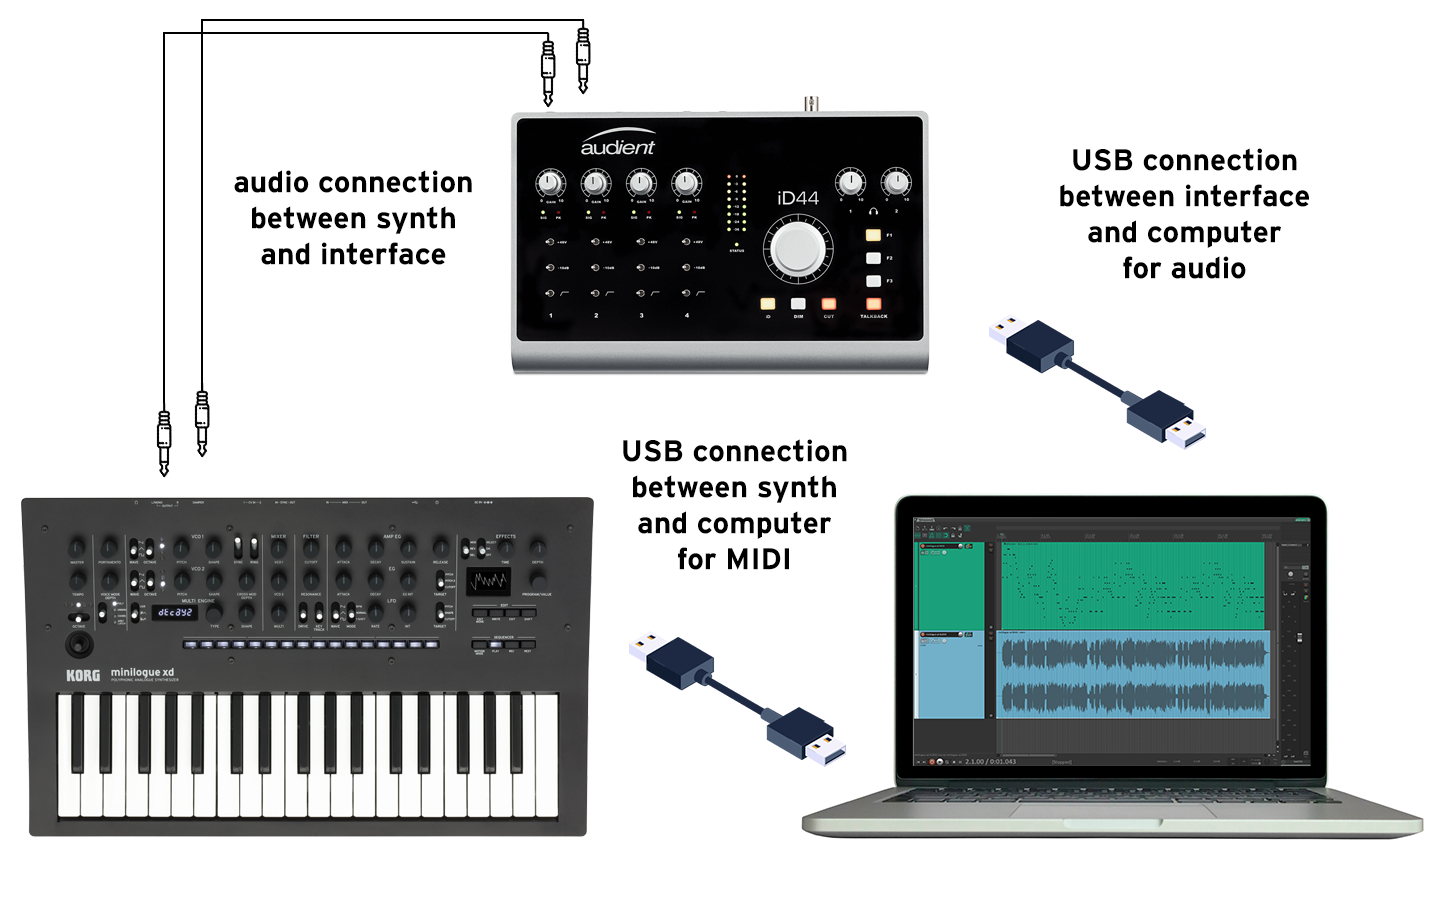
The image above illustrates the cable connections between all devices:
- The minilogue xd's left and right outputs are connected to the interface's line input 1 and 2 using standard 1/4" mono jack instrument cables.
- A USB cable connects the minilogue xd to the computer so it can transmit and receive MIDI signals.
- A USB cable connects the audio interface to the computer.
- The computer is running REAPER to record audio and MIDI data.
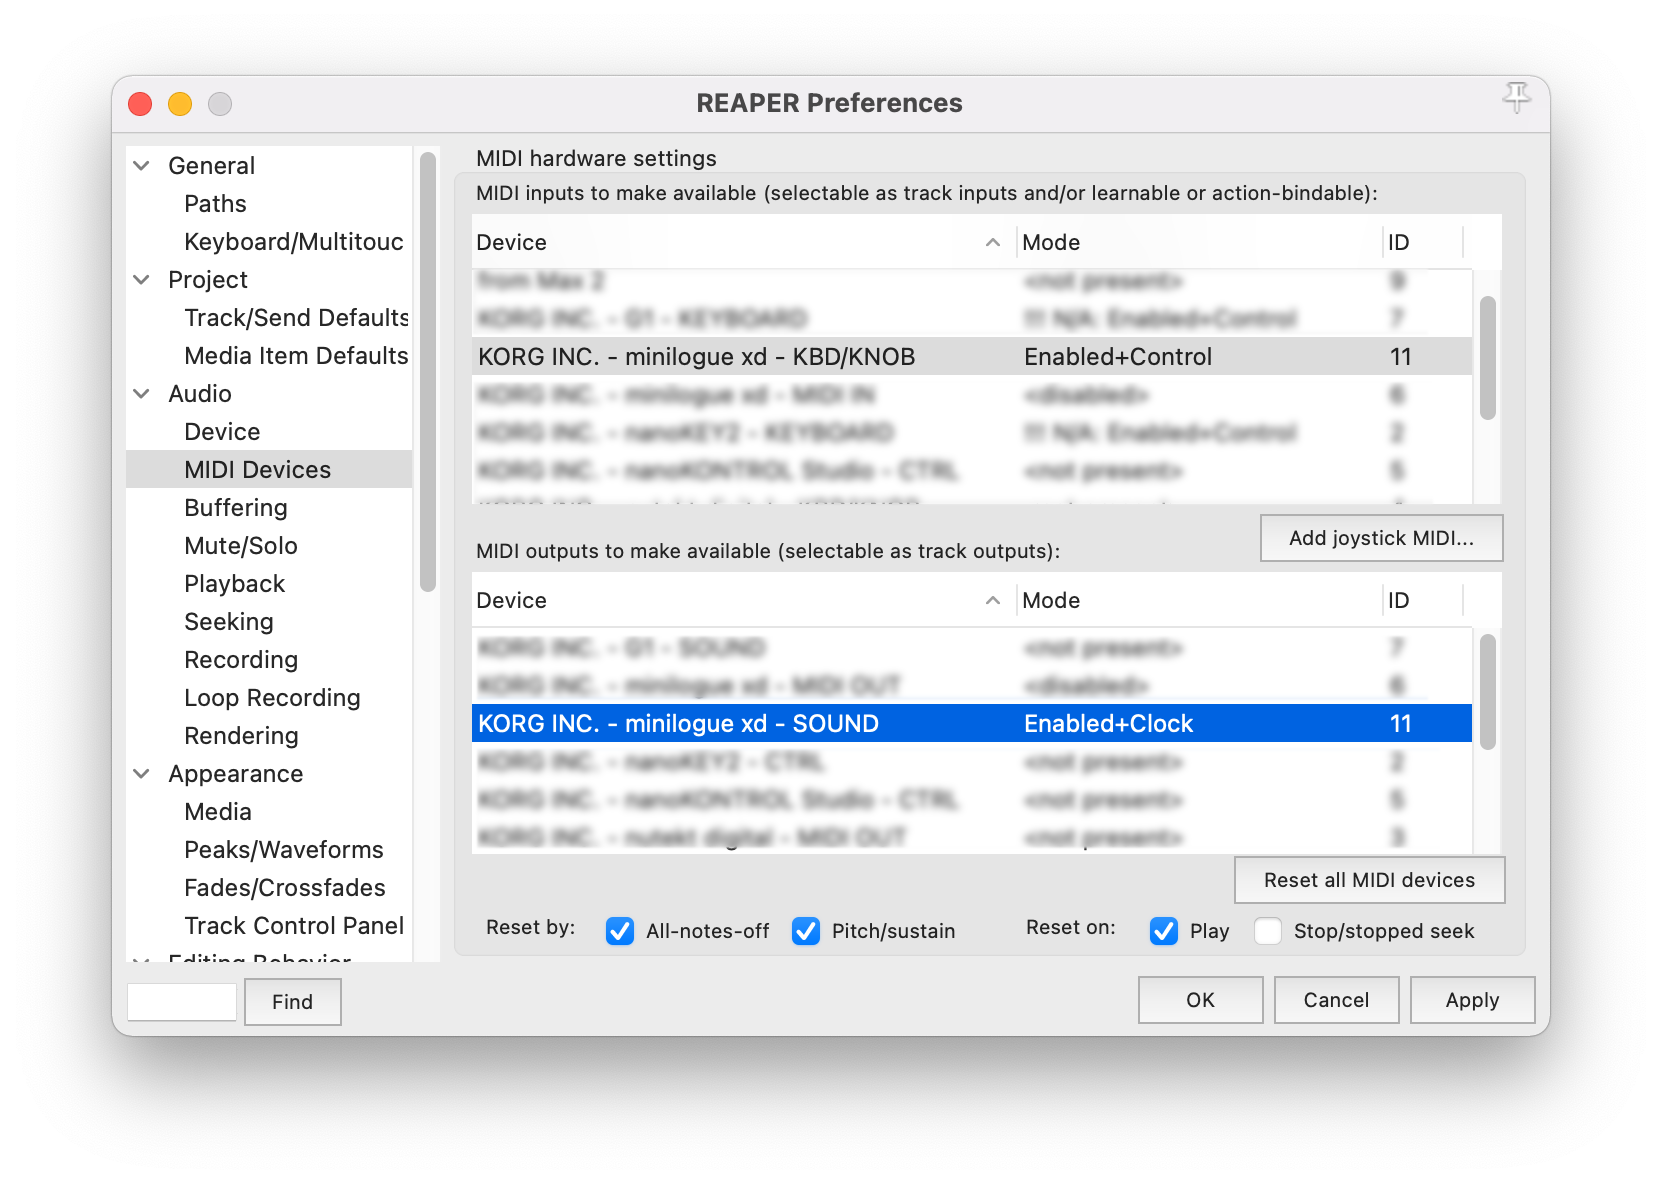
The next thing to do is to adjust REAPER's settings so that it uses the Audient ID44 as the interface for audio and the minilogue xd's USB connection for MIDI (including Continuous Control messages and MIDI Clock), as shown below: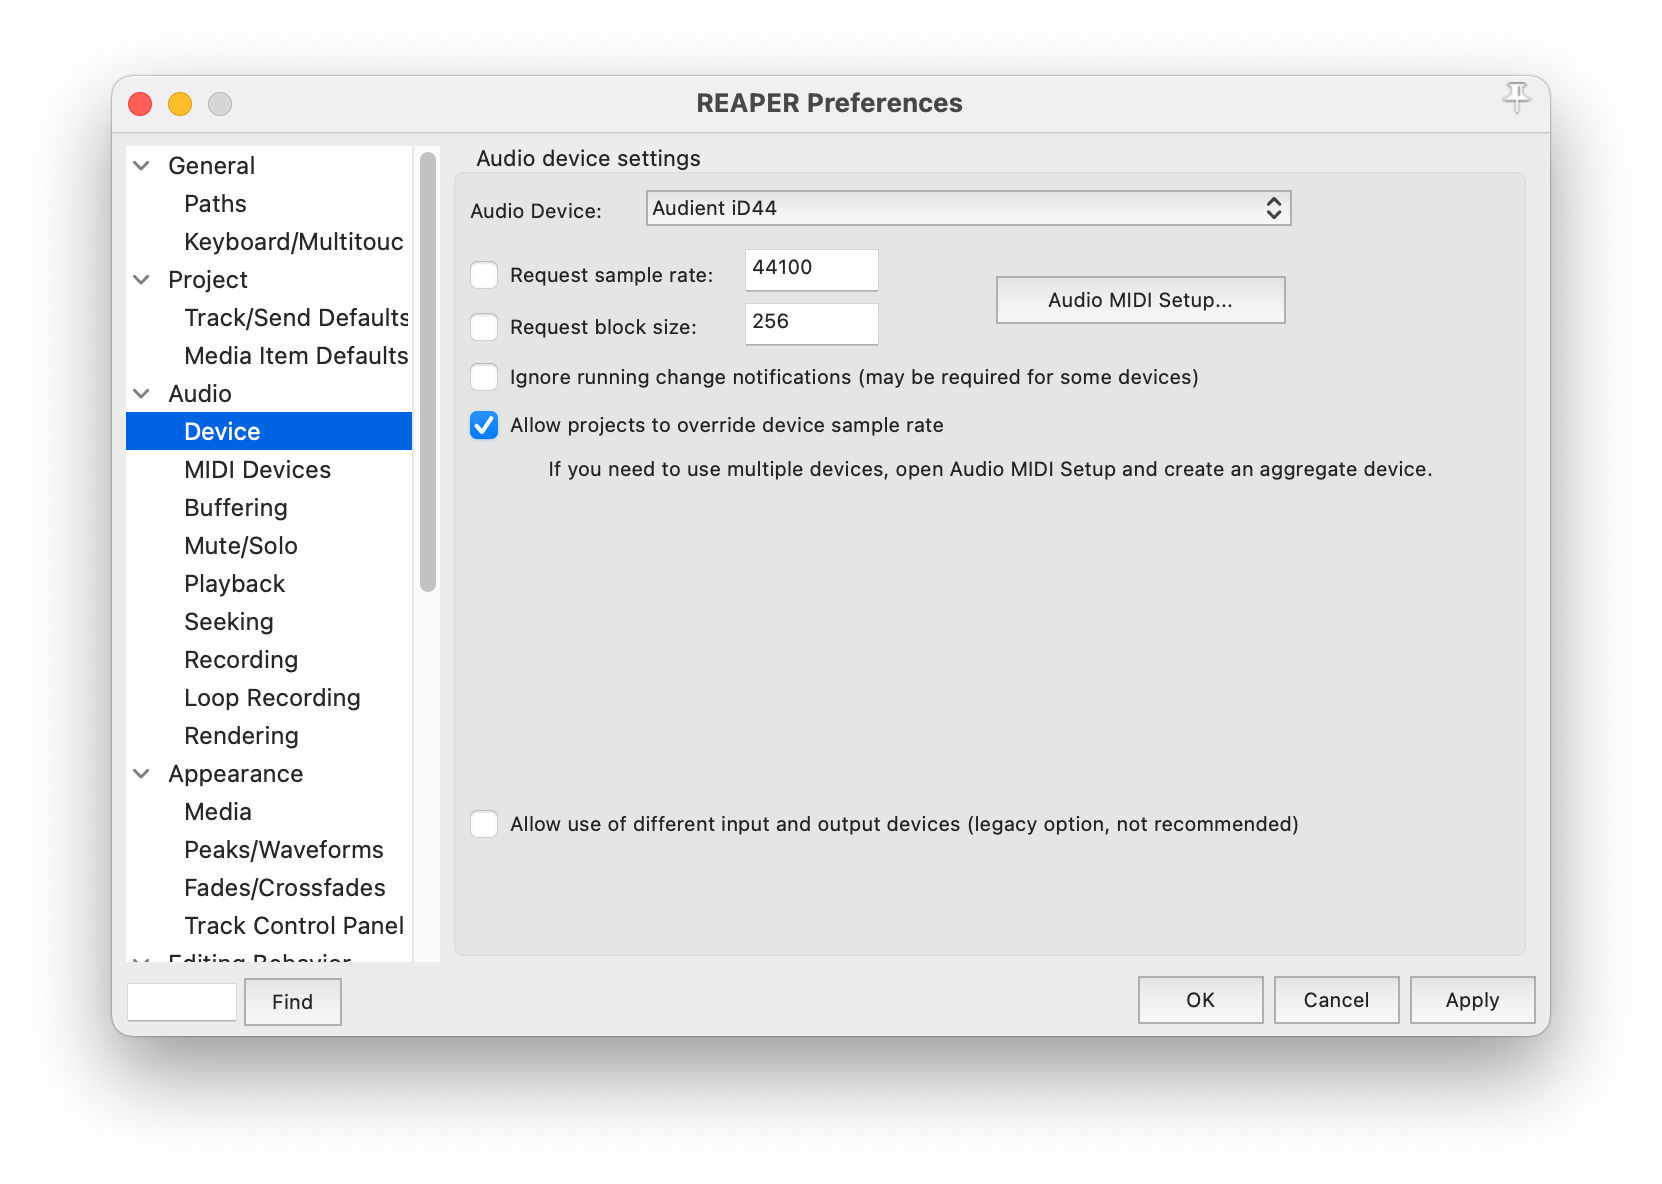
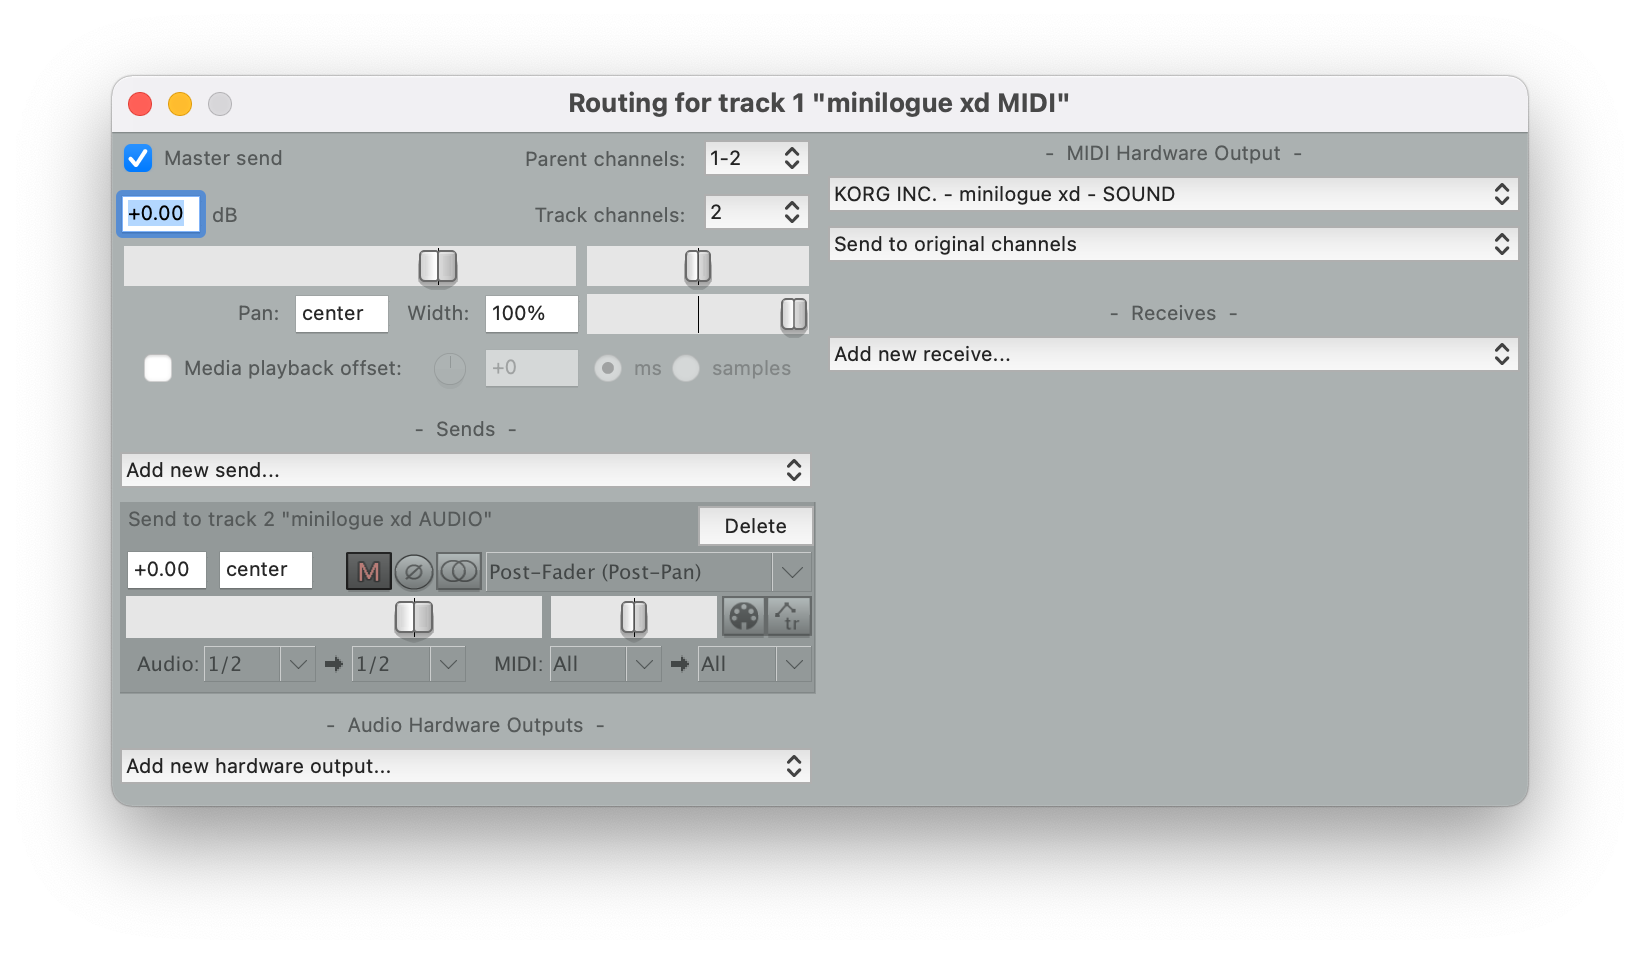
For the MIDI track in a project, we would recommend these settings: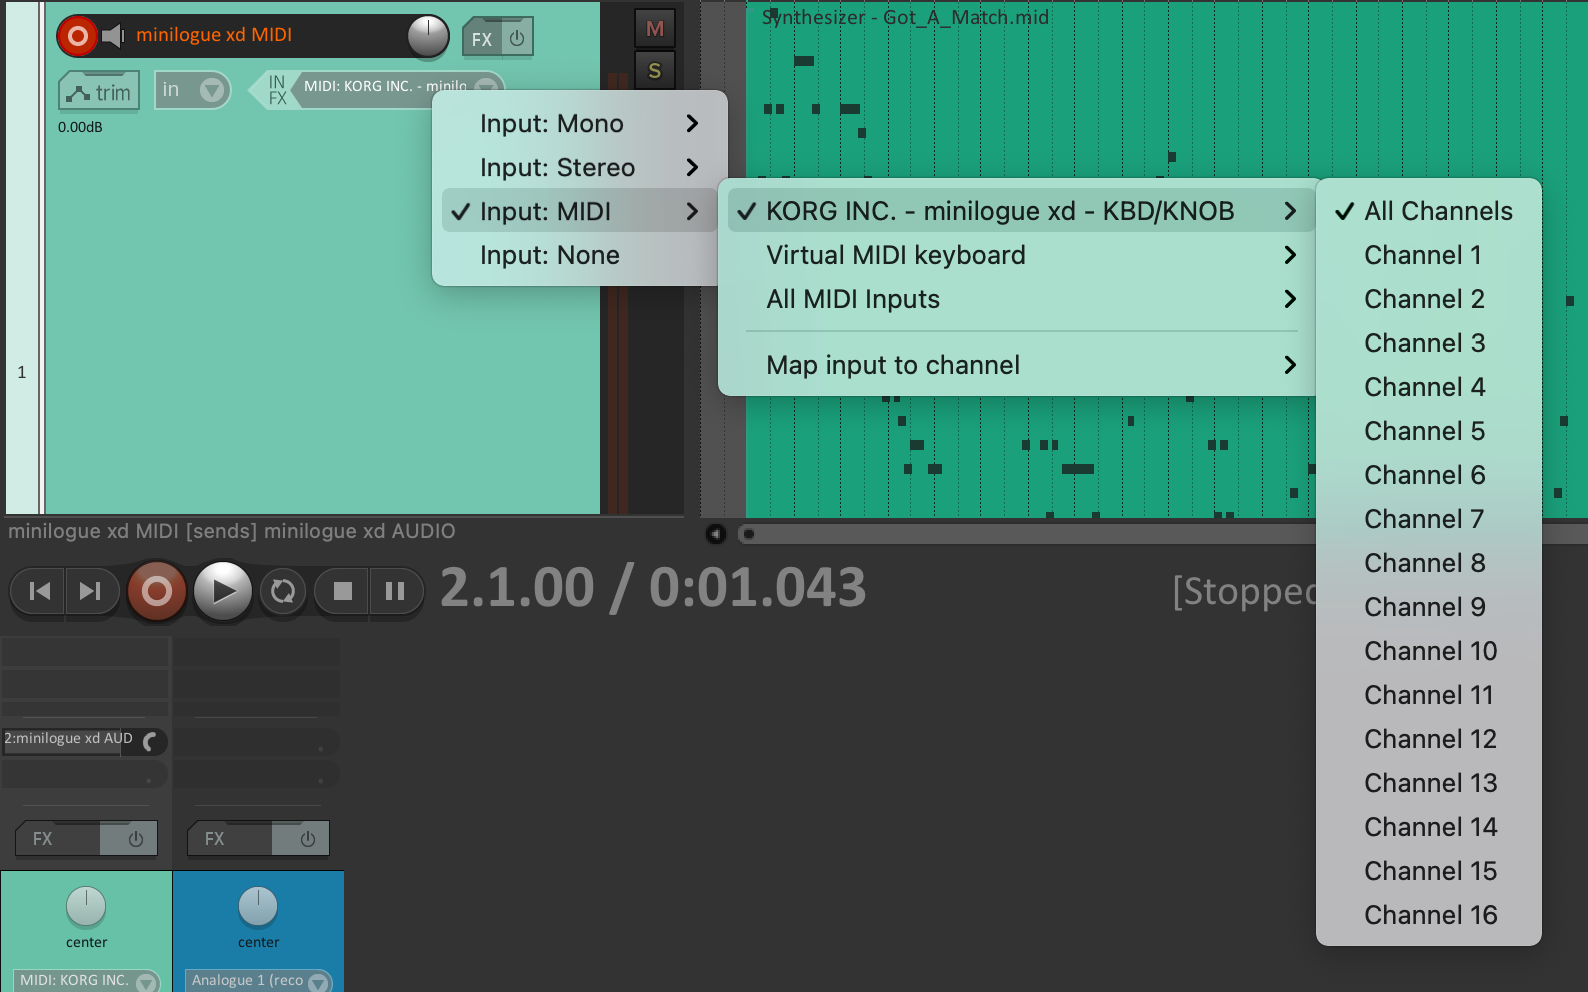
 Finally on the minilogue xd itself, we would recommend these settings:
- Set "LOCAL" to "Off". This will prevent notes being sent into the DAW from playing twice, as the software will be routing notes back to the synth. This can be found under the Global button 4 menu.
- Set "MIDI Clock" (Global button 6) to "Auto". This means that the minilogue xd will play in sync with your project's tempo by switching its MIDI Clock to external as soon as it receives MIDI Clock from the DAW.
- Set the "En Rx Transport" setting to "Off". This prevents the DAW from starting the minilogue xd's built-in sequencer.
And that is everything for now - all physical connections and settings should now be in place for you to record the minilogue xd's MIDI and audio signals into your projects.