Using the nanoKONTROL Studio with Logic in assignable modeUpdated 5 months ago
Note: This tutorial is also applicable to the nanoKONTROL2. |
The nanoKONTROL Studio is designed to work well pretty much straight out of the box with supported DAWs and setting it up is a very straightforward process.
The Control Surface Plugin for Logic and Garageband adds extended “Native” functionality which again requires no manual setup – you simply install the plugin and as soon as you launch Logic or Garageband, the unit will be automatically mapped to control commonly used parameters like mixer volume, pan, rec, mute, transport controls, etc.
But that is not the only way it can be used, of course. There may be times when you might prefer to take advantage of the great selection of physical controls on the unit to transmit custom MIDI messages. This could be useful for controlling software instruments in real time or to write plugin automation, for example.
For times like this, the nanoKONTROL Studio can be set to run in “Assignable mode”. To do that, power it on while holding down the SCENE and CYCLE buttons. Once set to Assignable mode, you can then use the KONTROL Editor software to set the MIDI messages that you would like to be transmitted by each physical slider or button on the unit.
| Quick tip: After you have assigned your choice of messages to the controls, it is important to ensure these settings are transmitted to the unit by selecting the “Write Scene Data” from the “Communication” menu inside KONTROL Editor software. |

If you have never installed the Control Surface Plugin for Logic/Garageband on your system, you are ready to go at this stage – simply launch Logic and the unit will transmit your custom MIDI messages.
However, if you have previously installed the Control Surface Plugin, it will always set the unit to work in “Native” mode within Logic rather than using your assignable settings unless it is removed.
A couple of steps are needed to completely remove the Control Surface Plugin from your computer:
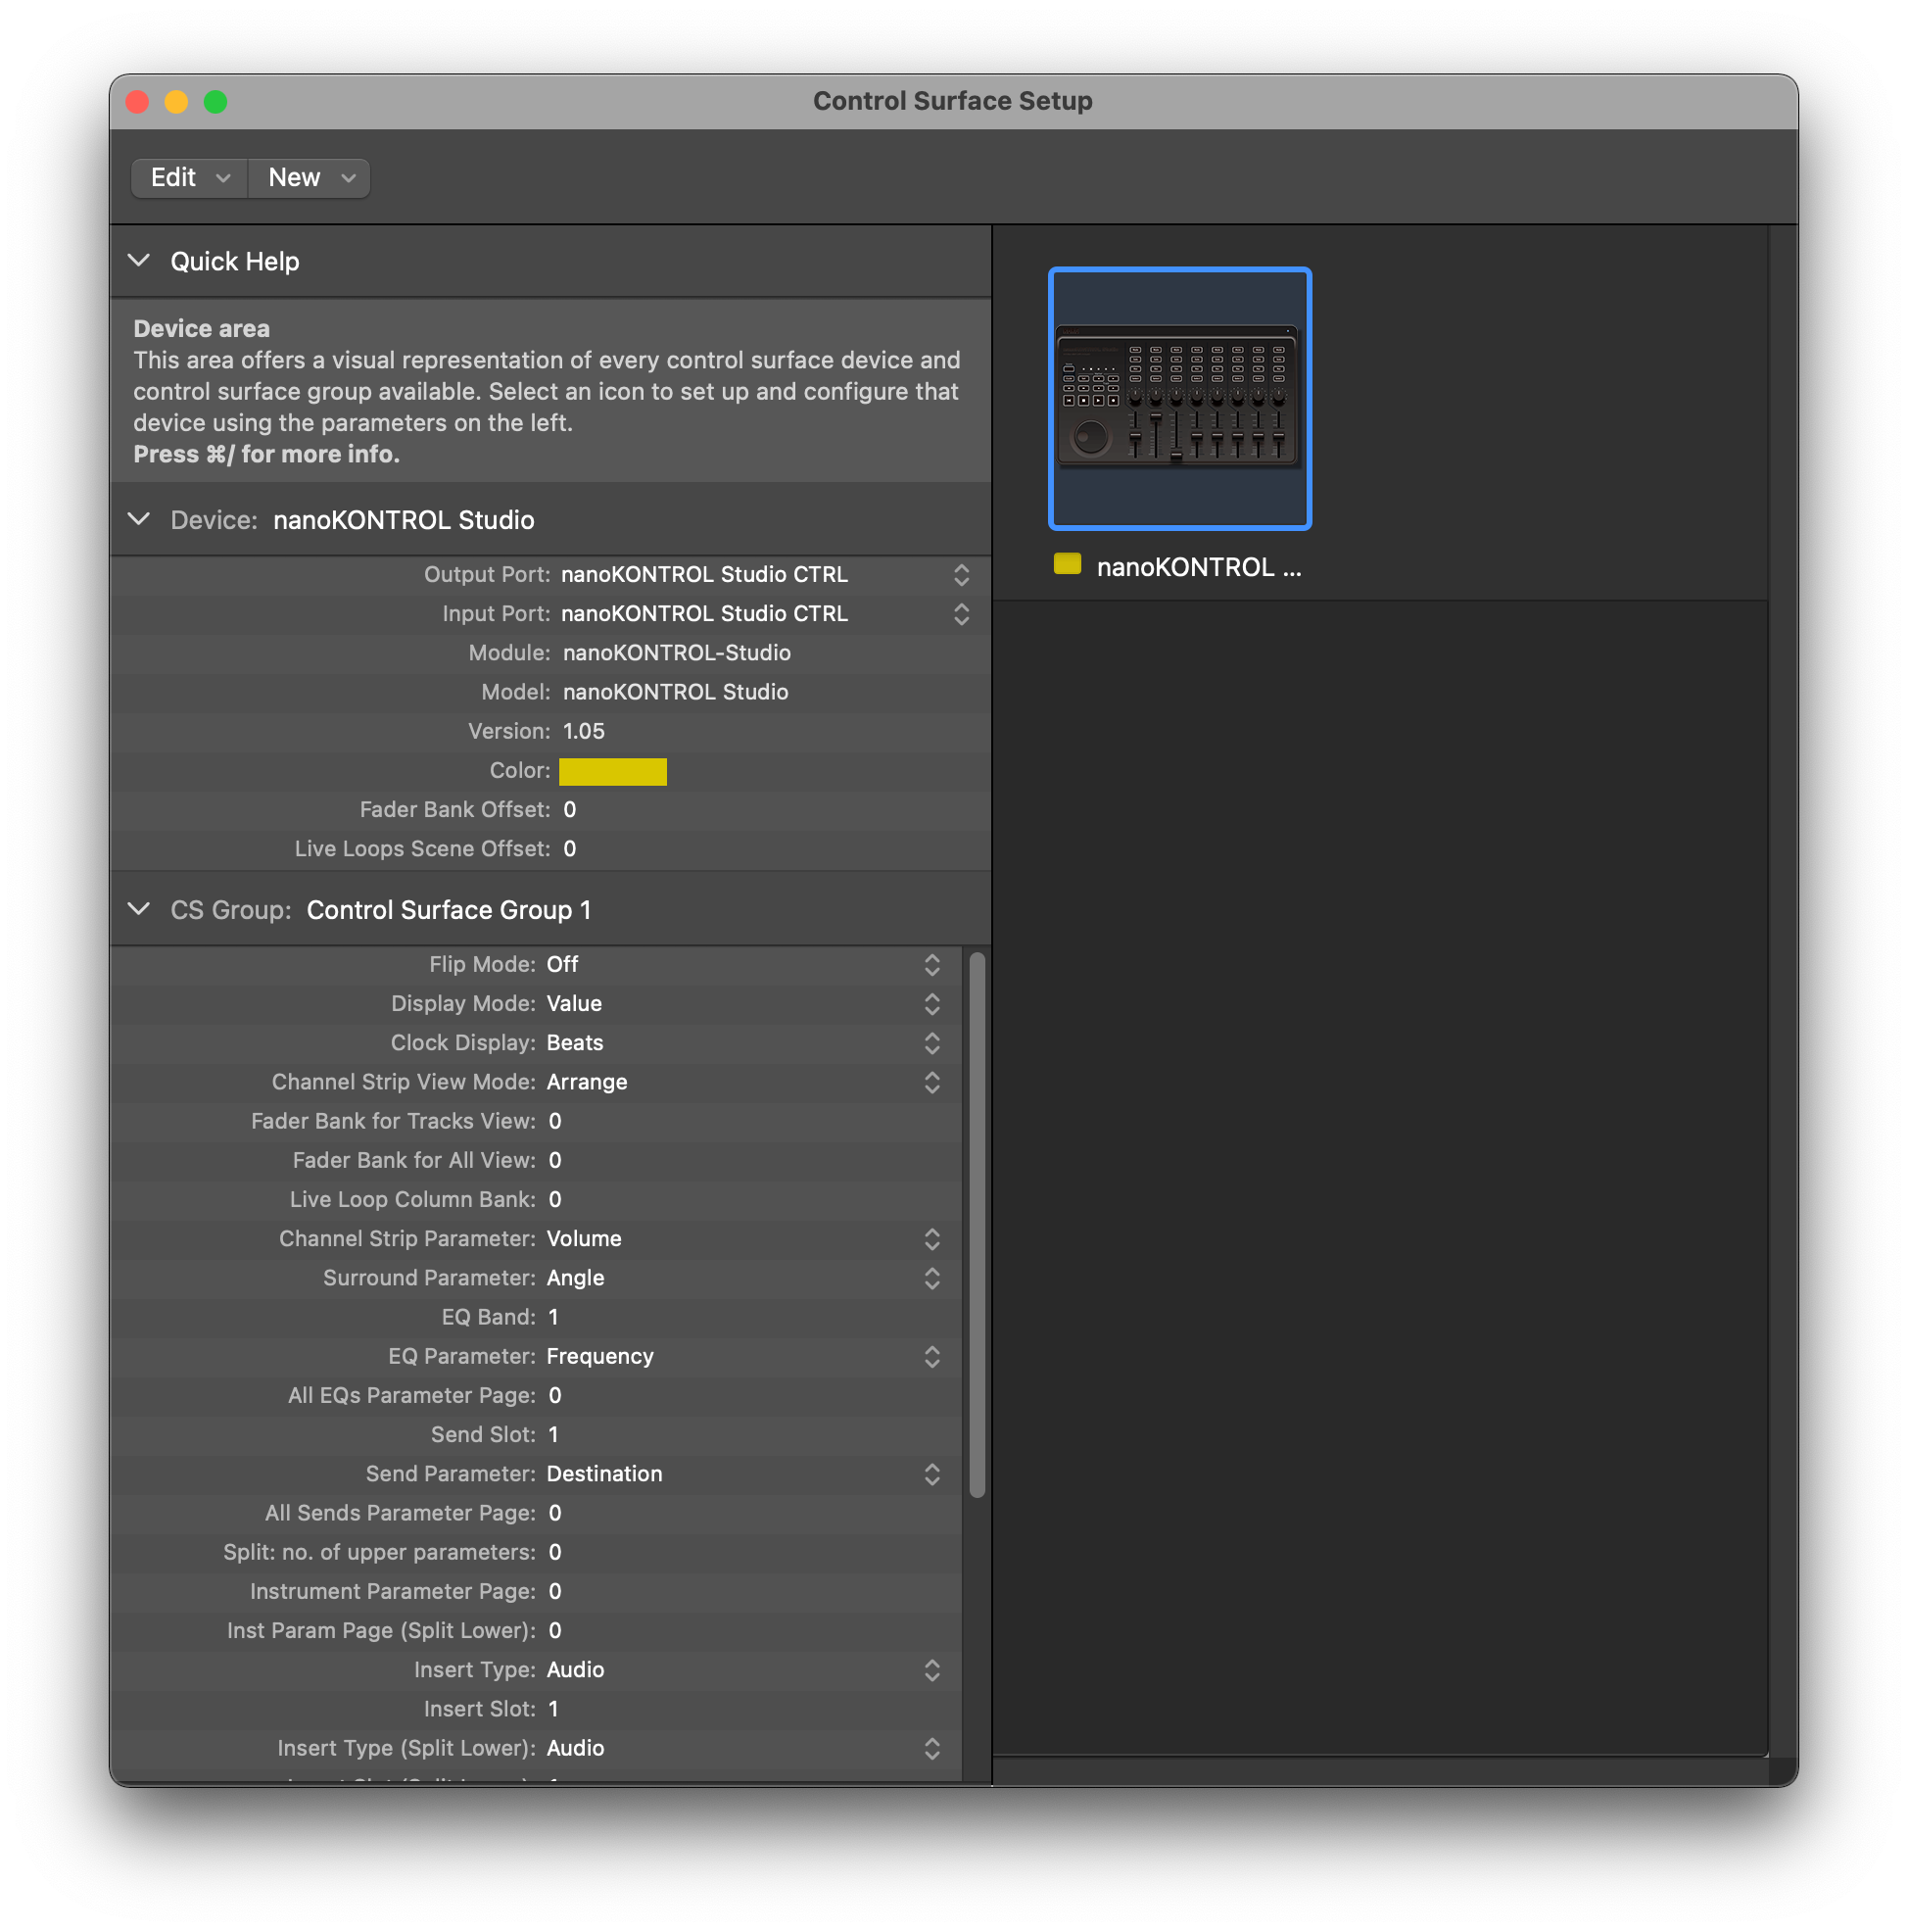
- From the Logic Pro X menu, select “Logic Pro X”-“Preferences”-“Control Surfaces”-“Setup...”,
- Open the control surfaces setup window.
- Click and select the nanoKONTROL2 Studio icon, press the [delete] key on your computer keyboard to delete nanoKONTROL Studio information.
- Now you need to access these folders:
~/Library/Preferences/
/Library/Application Support/MIDI Device Plug-ins/ - Delete these files:
- com.apple.garageband.cs
- nanoKONTROL Studio.bundle
To do that, you need to select the “Go to folder…” option in Finder.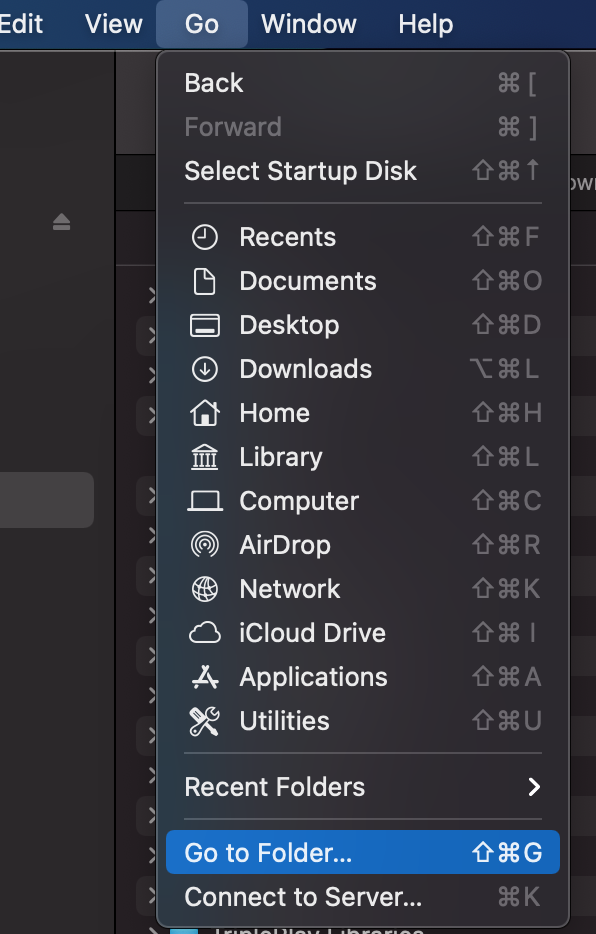
Copy the folder address listed above, paste into the window that appears and click "Go".

Once Finder shows you the folder, locate the files above and delete them. This completely removes the Control Surface Plug-in from your system so you will be able to keep using your own assignable settings within Logic and Garageband as well.